📋 Add and Manage Your Contracts
Keep activation and cache status together. Connect your wallet, sign in, and select the network where your contract is deployed.
Step 1: Enter the contract address
Open My Contracts and select + Add Contract. Enter the full deployed address and let the app validate it.
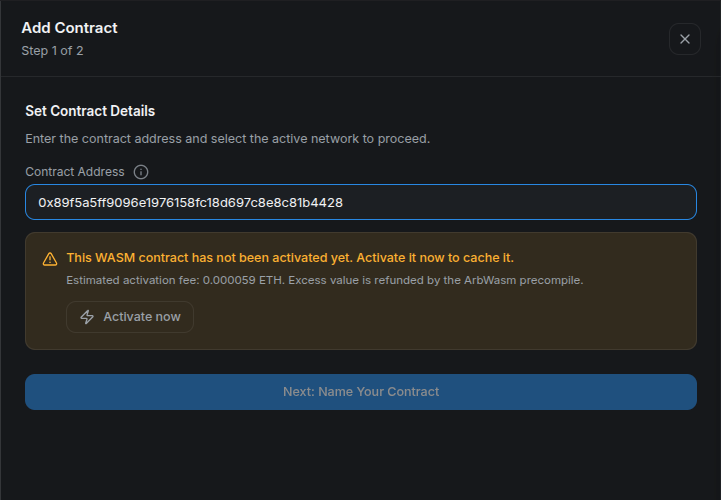
If activation is required, follow Activate a Contract. The address must refer to a Stylus program on the selected chain.
Step 2: Give it a name
Continue to the name step, enter an optional display name, and select Add Contract.
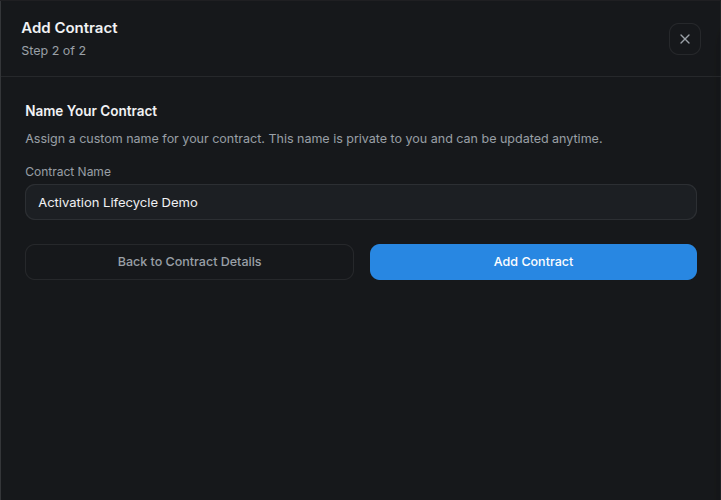
Saving a contract adds it to your account's list. It does not fund the Gas Tank or enable automation.
Step 3: Inspect both tabs
Select the saved contract to open its details. Use the list's search, status filters, and pagination to find programs as the list grows.
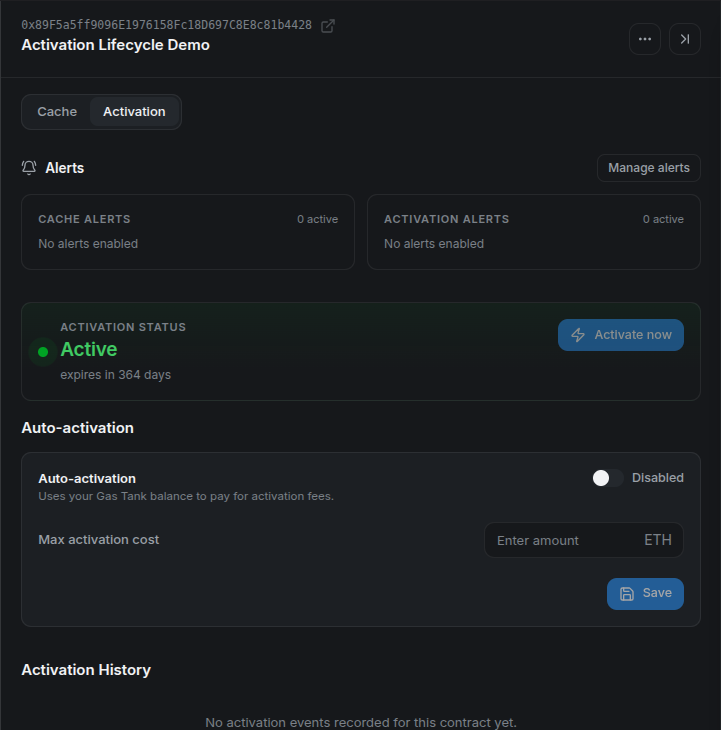
- Activation shows current activation state, lifetime, auto-activation settings, and automation history.
- Cache shows cache membership, bidding, eviction risk, and bid history.
- Manage alerts configures notifications for the selected contract.
Check the full address and selected network before taking an action. A contract can be Active and Not Cached at the same time.
Next: Activate a Contract, Place a Bid, or Set Up Alerts.